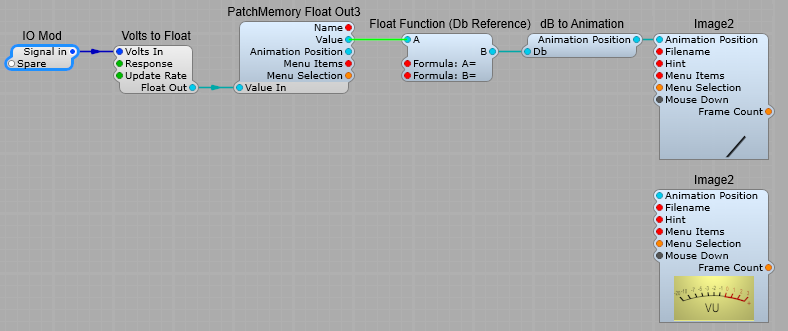
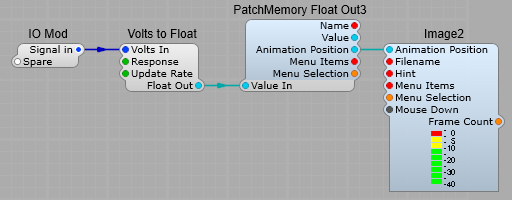
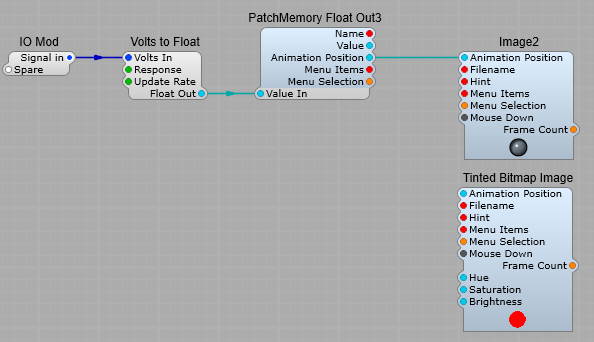
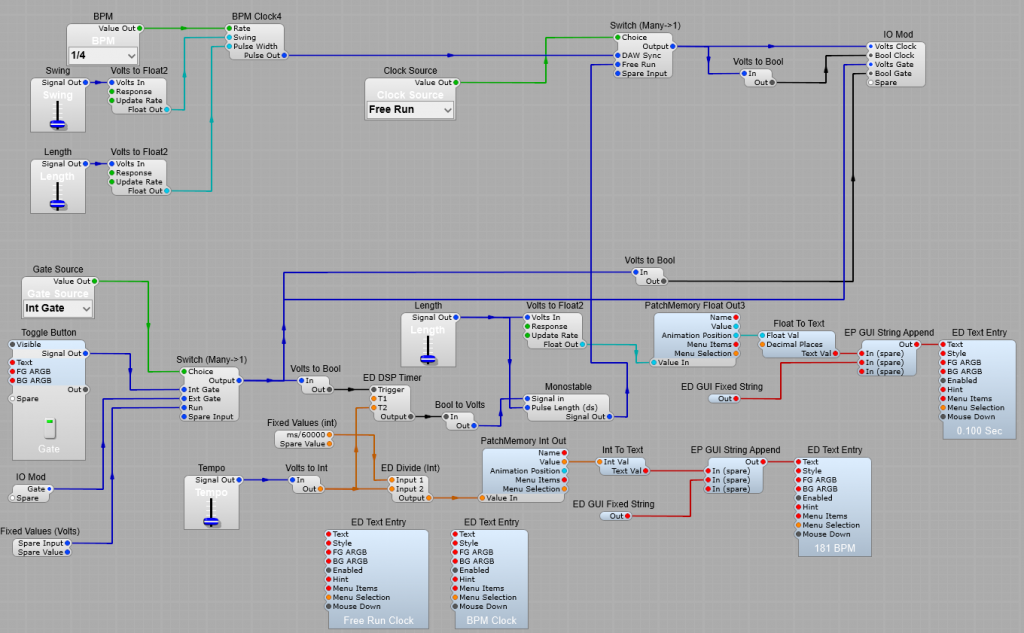
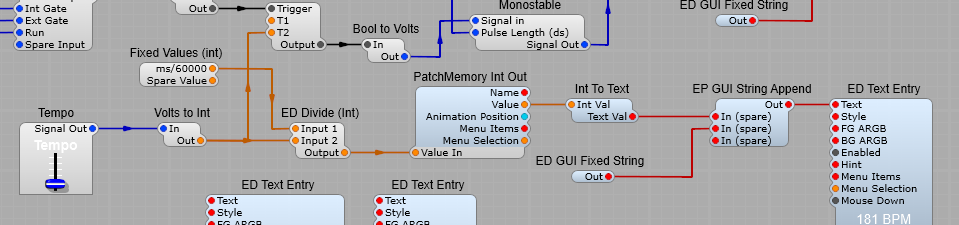
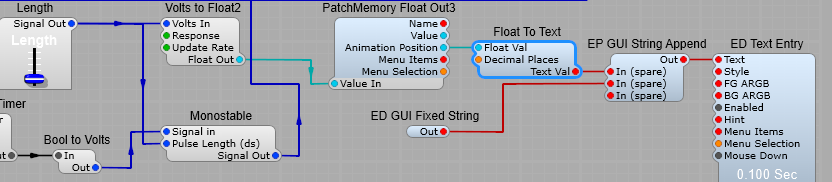
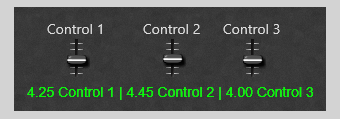
This prefab is a means of taking the values from multiple controls, and combining them into one display. The voltages are converted from DSP volts into GUI text, and combined into a single string for display in a text module, the resulting control panel is shown below. The limiting factor for this application would be how complex you feel the display can be, and still be;
a) Useful and easily read,
b) How complex do you want this structure to be,
c) If you are handling large amounts of text data in this way (DSP to GUI conversion) you could potentially be using up valuable system memory, and slowing the plug-in down.
Note: Due to this works , entering text values to alter the control position/value is not possible, for this reason, to prevent bug reports I have made the display’s Text Entry module non-editable, and would suggest that you do the same.
How to combine multiple voltage values into one text string for display.
The main container structure is shown below. The principle is to take (in this example) three voltages, and combine them.
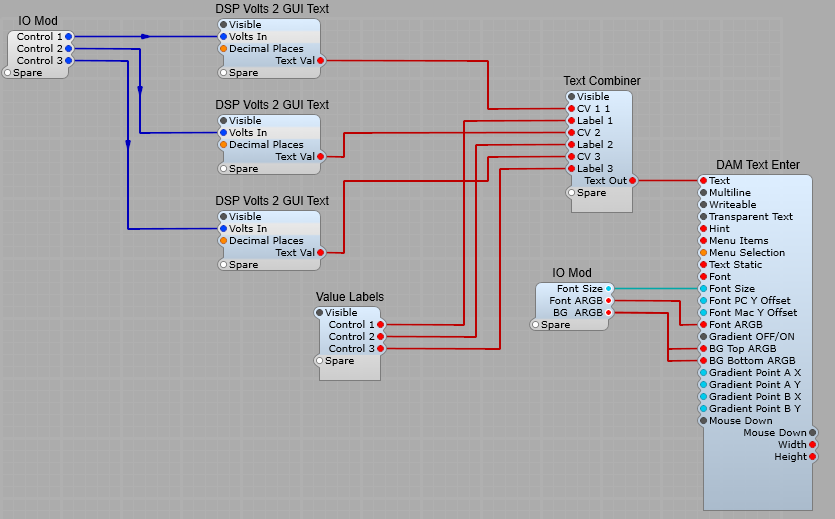
Converting DSP Volts to a Text string. (DSP Volts 2 GUI Text)
We have used this before for adding a readout to a slider or knob, so no big surprises here.
Tip: If you fix the number of digits after the decimal point rather than leaving Decimal Places at the default of -1, this stops the display from jumping around as the value changes and the number of digits changes.

Combining the text strings. (Text combiner)
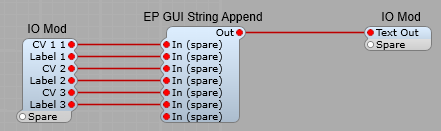
This is where we combine (append) all the text strings into one long string for display, using the ED GUI String Append module (the typo in the module name is Elena’s not mine).
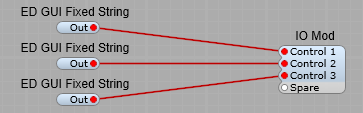
Creating the control name labels. (Value Labels)
I used the structure space, control name, space | space.
The idea is get a structure like so. Where _ is used to indicate a space
_5.5 _Control 1_|_6.6_Control_2_|_5.9_Control 3_
So the first Fixed string will contain;
_Control_1_|_
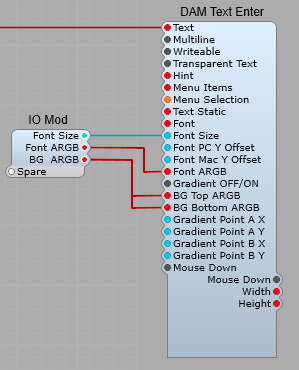
The Display.
I used Davidson’s DAM Text Enter module as it gives us options for the Font, Font size, Font colour, Background and Foreground colours. Just remember to set the Text Entry to “Non Writeable”.